Eric Ellis is currently the lead guitarist for Jim Morris and the Big Bamboo Band. He is also working with Tom and Michelle Becker and their "Back Home Again" show - a tribute to the music of John Denver. Eric has been writing and performing his original music in venues across the country for several years now and has produced two CD's of his own. After moving to the South, he honed his skills as a blues guitarist and became a sought after sideman. Eric subsequently co-founded a country band that opened for dozens of national headliners including Blake Shelton, Gary Allen, Toby Keith, Diamond Rio, Rascal Flatts, Little Big Town and Keith Urban. More recently, Eric toured the country with a tribute show to "The Music of Jim Croce" playing the part of the late, great Maury Muehleisen. Eric is a native of Canada and a graduate of Layola College.
Eric and I have discussed his preferences and have decided on a OM sized guitar. We will be using a very nice set of Koa for the back and sides and a master grade Lutz sound board. The neck will be Mahogany and the fret board Ebony. I will be adding several custom shell inlays to personalize the guitar for Eric
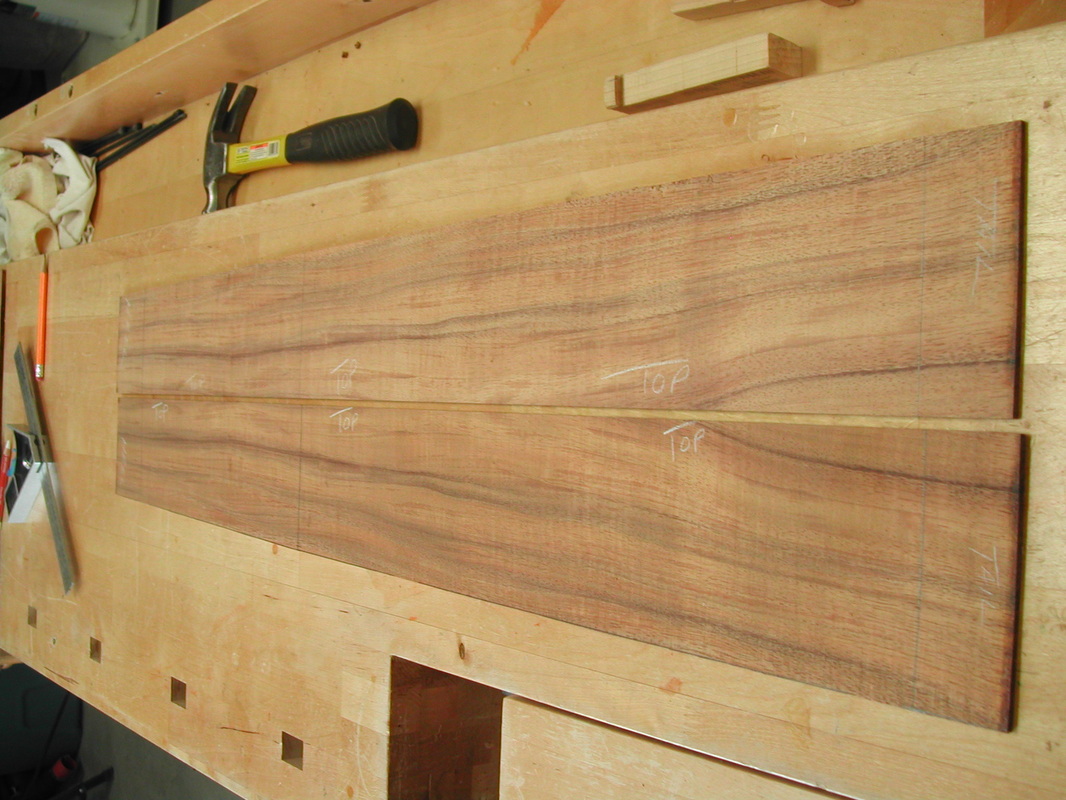
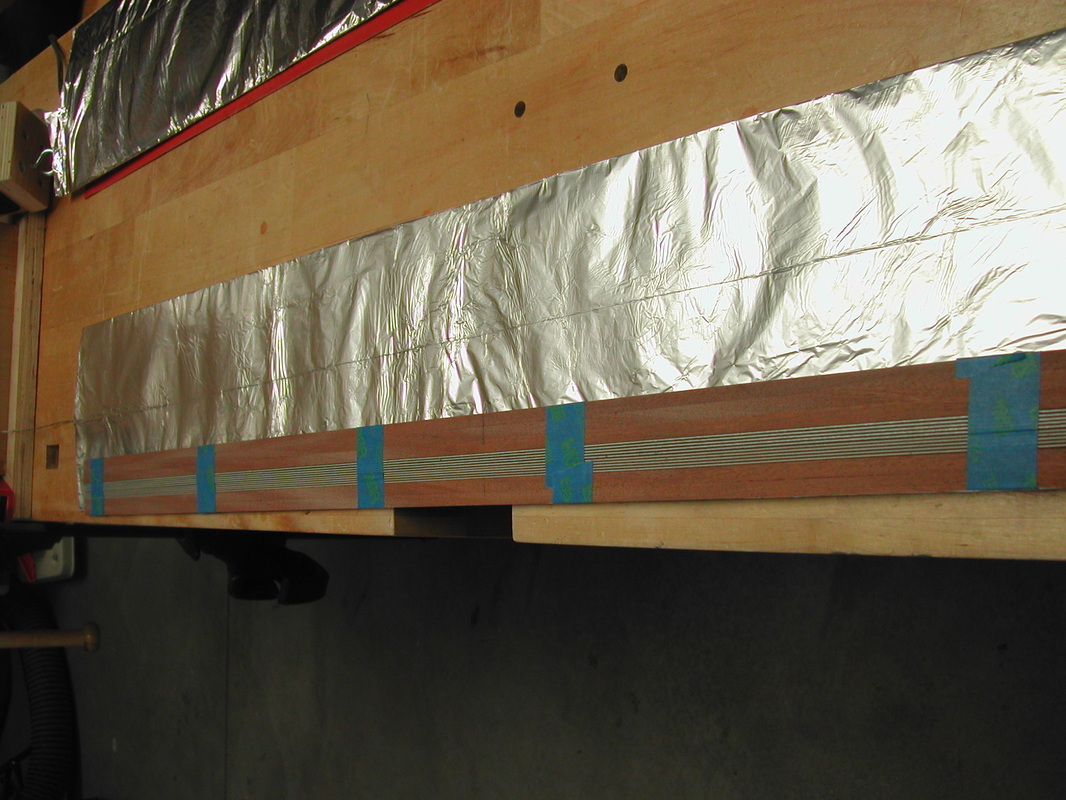
Starting with thinning and preparing the sides for bending:
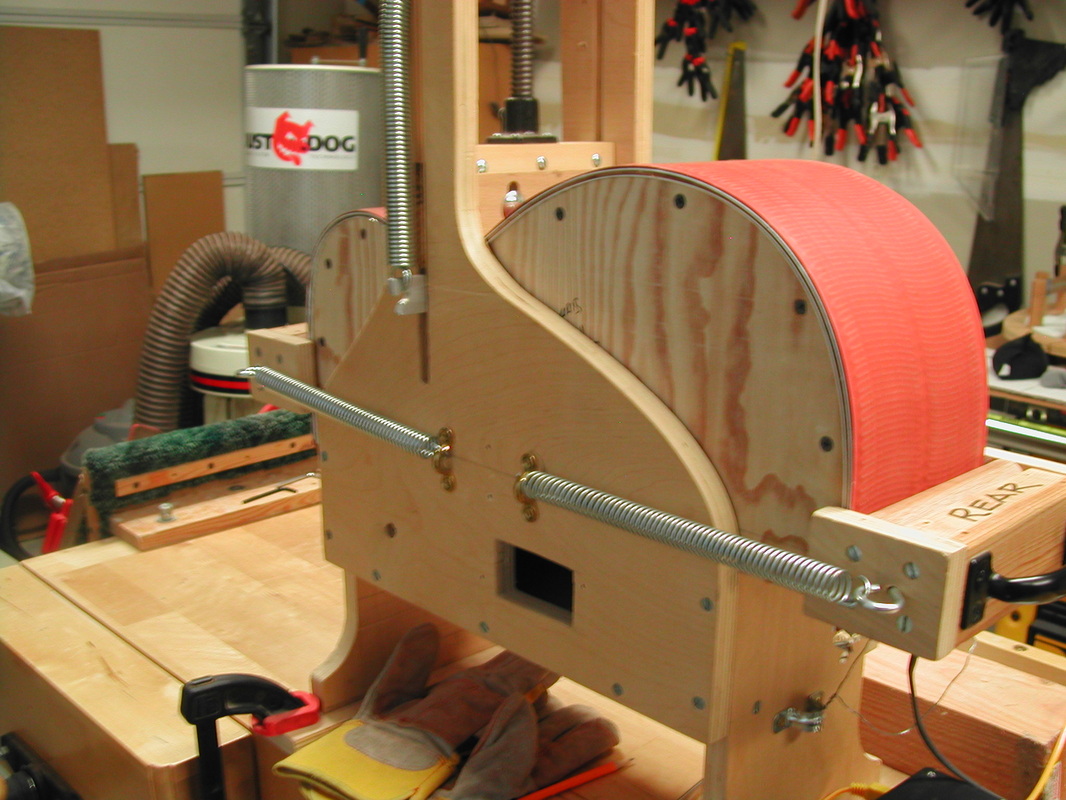
I use a Fox style bender with a heat blanket (orange color). A side is lightly sprayed with water and placed in an aluminum foil jacket, which is sandwiched between to pieces of spring steel with the heat blanket on the outside. Then placed in the bender and heat is brought up to 300 degrees F. As the heat comes up I start bending the waist and upper & lower bouts. Heat remains on for 15 minutes and then the wood is allowed to cool. Then heat is brought back up to 300 degrees for another 15 minutes and allowed to cool again.
The 2 sides are placed in my building form and heel & tail blocks are glued to the sides.
Mahogany linings are glued on the sides. These linings give us more glue area for the top and back.
Side reinforcement pieces are glued. These small pieces of wood will help stop a crack from spreading along the entire side if the guitar is damaged. They may also make it a little easier to repair if some damage occurs.
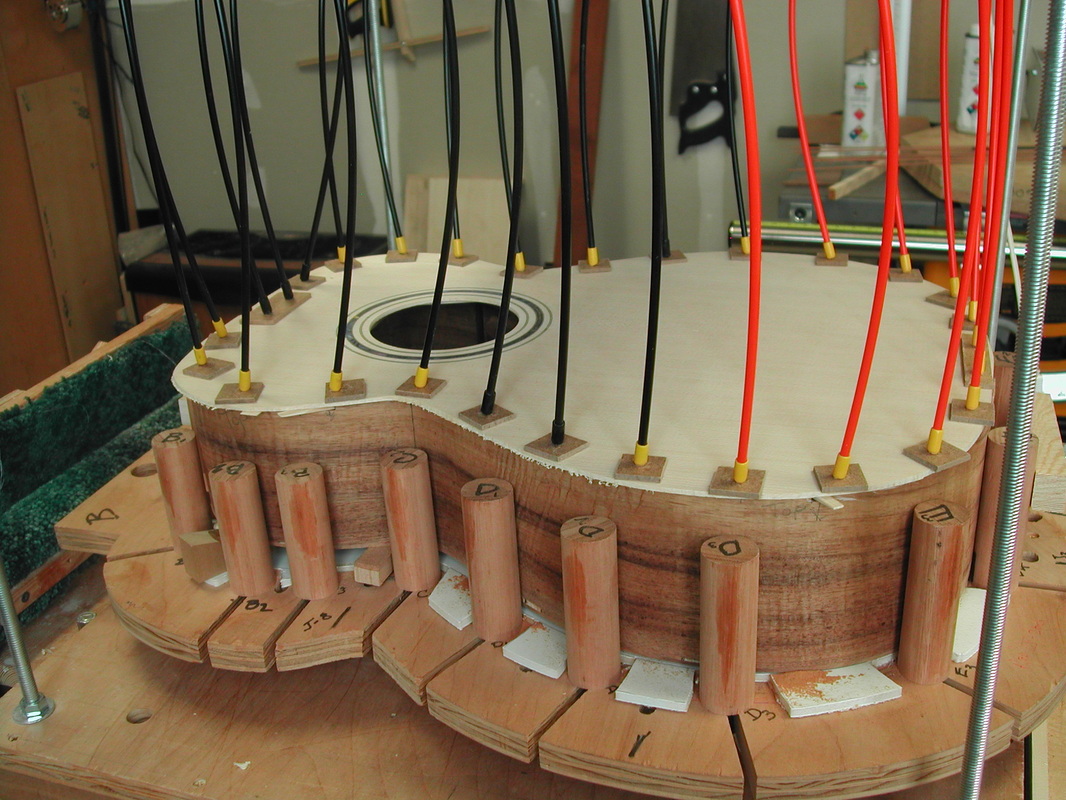
The top and back of the guitar are braced on a concave work board (pictures later on in the documentation) giving them a domed shape. The top and bottom of the sides are sanded to the same dome radius so that the back & sound board precisely fit the sides.
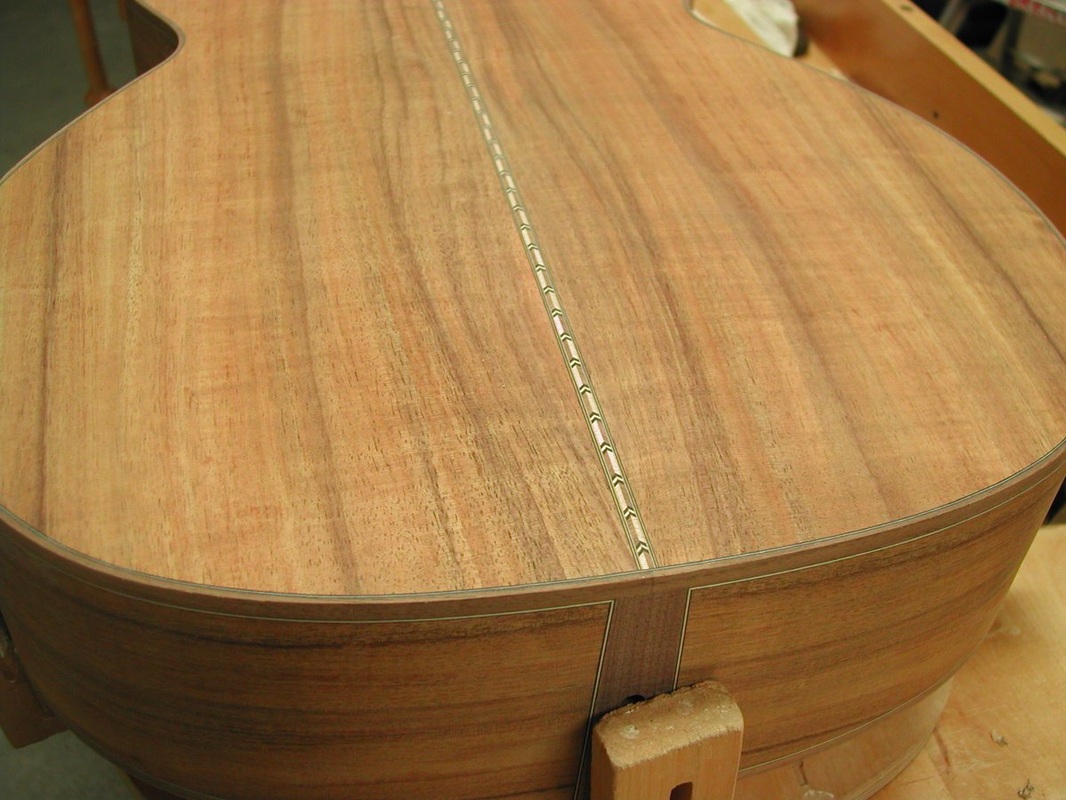
The back of the guitar is Koa cut from the same piece of lumber as the sides. The back is 2 pieces of book matched Koa with a decorative back strip. The 3 pieces are being glued in the photo below:
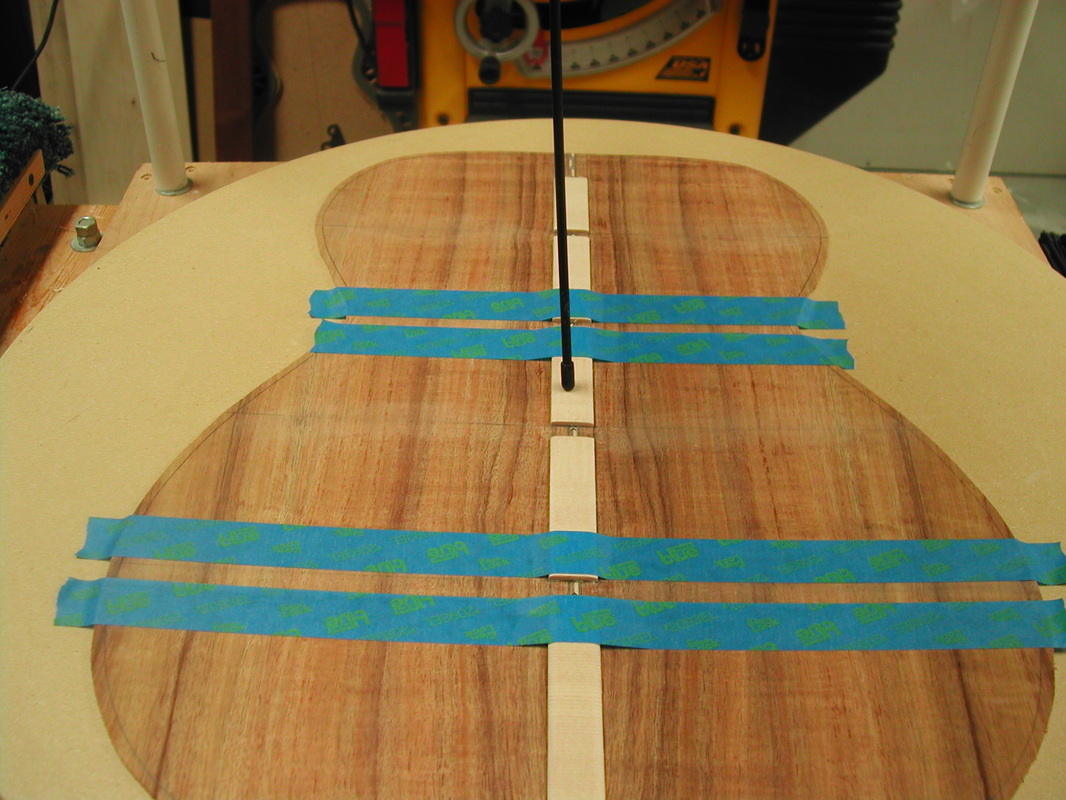
A back strip has been installed over the center joint of the back and has been cut to accept the 4 back braces. The round MDF board that the back is resting on is concave. It has a radius of 15'. The bottom of the braces are cut to the same radius so that the back will have a domed configuration - making it stronger and less effected by humidity.
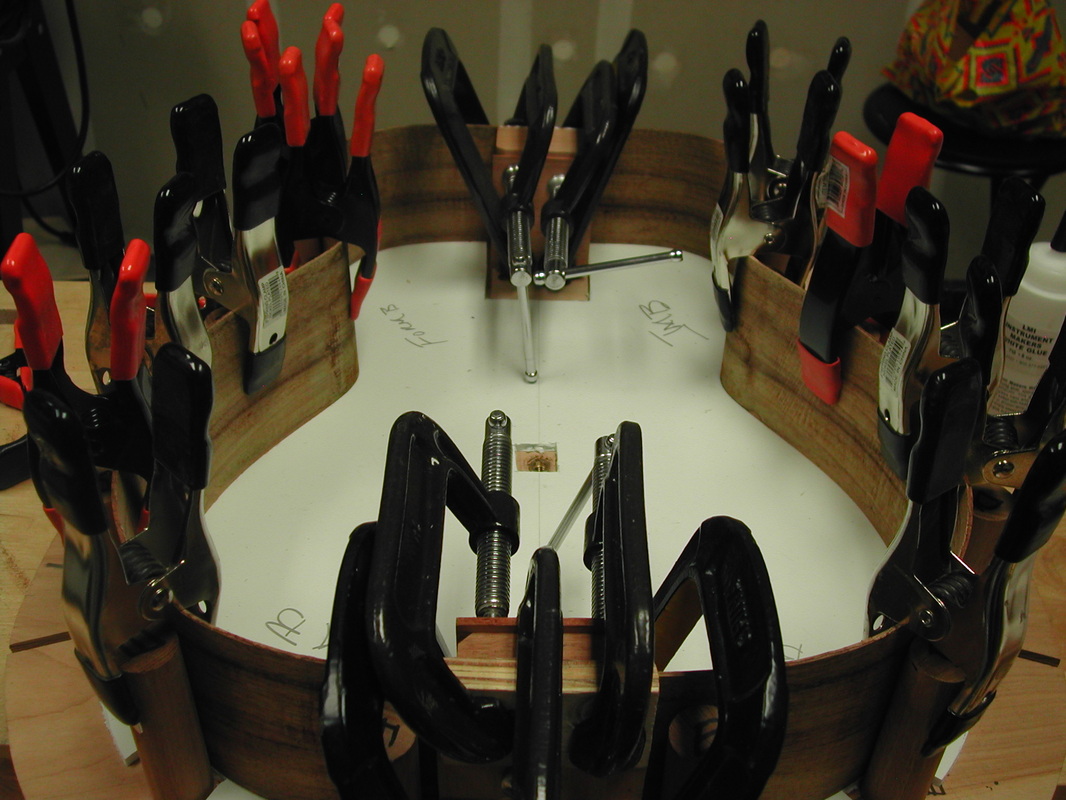
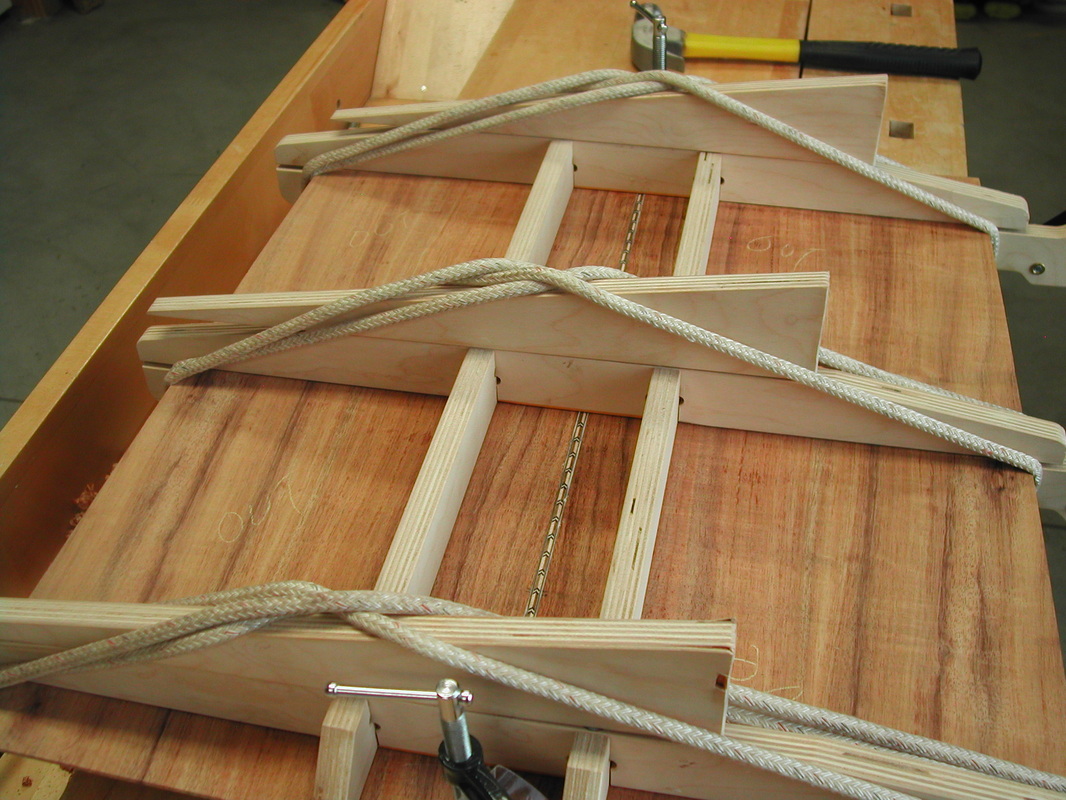
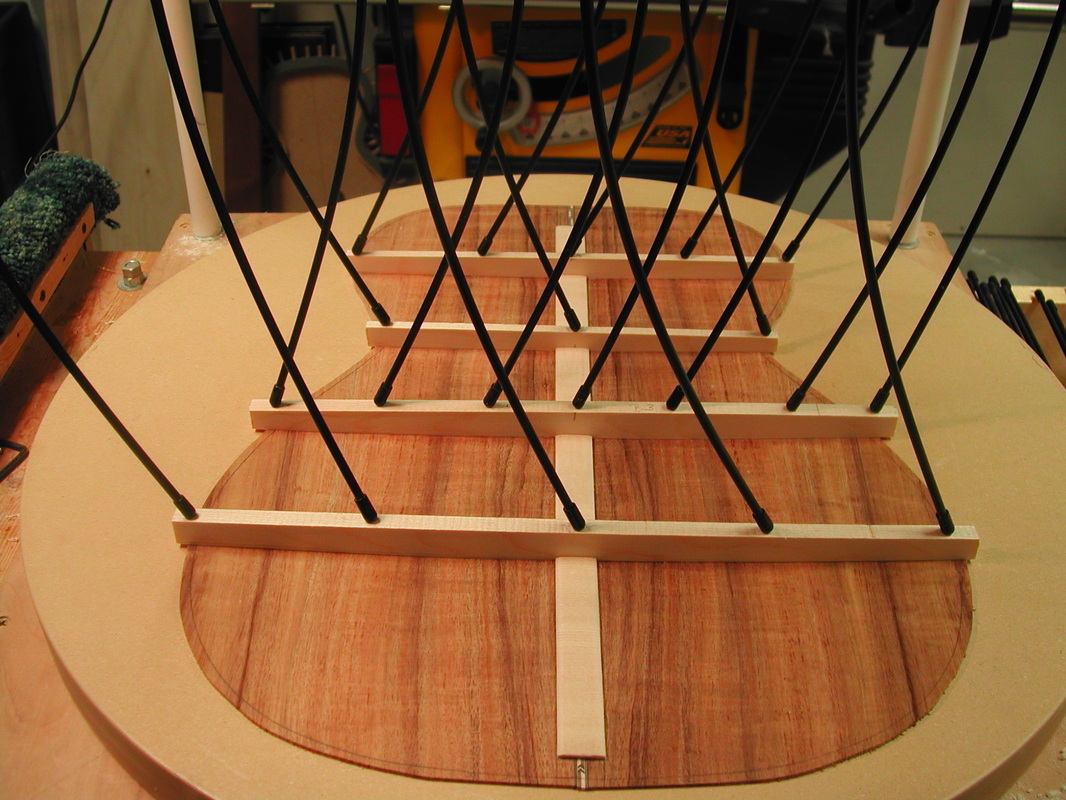
In the picture below, four back braces are glued to the back using fiberglass kite rods to provide clamping pressure while the glue sets.
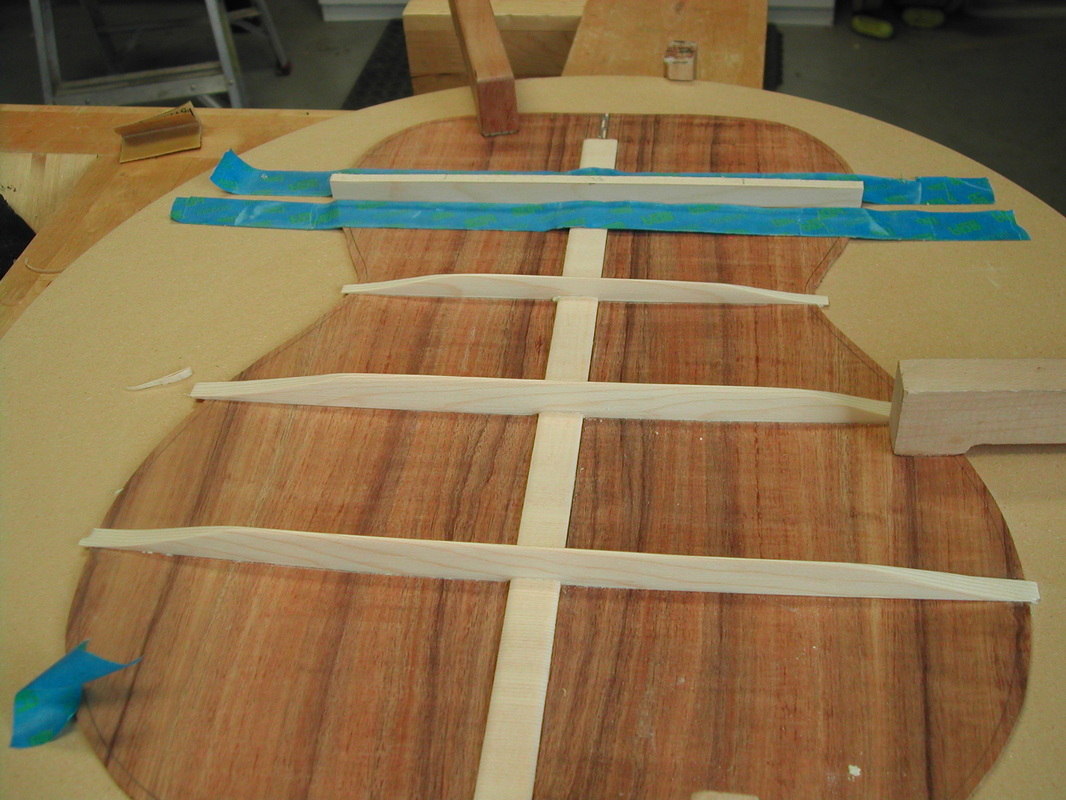
3 Back braces carved to final shape and preparing to carve the fourth.
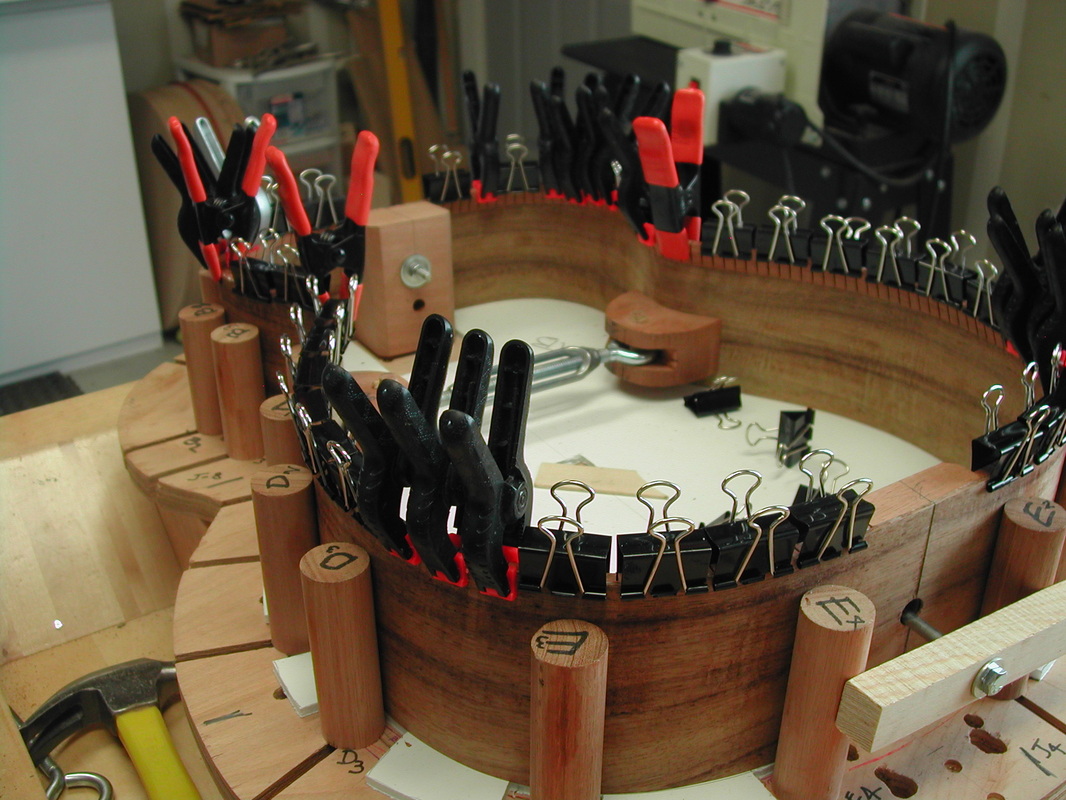
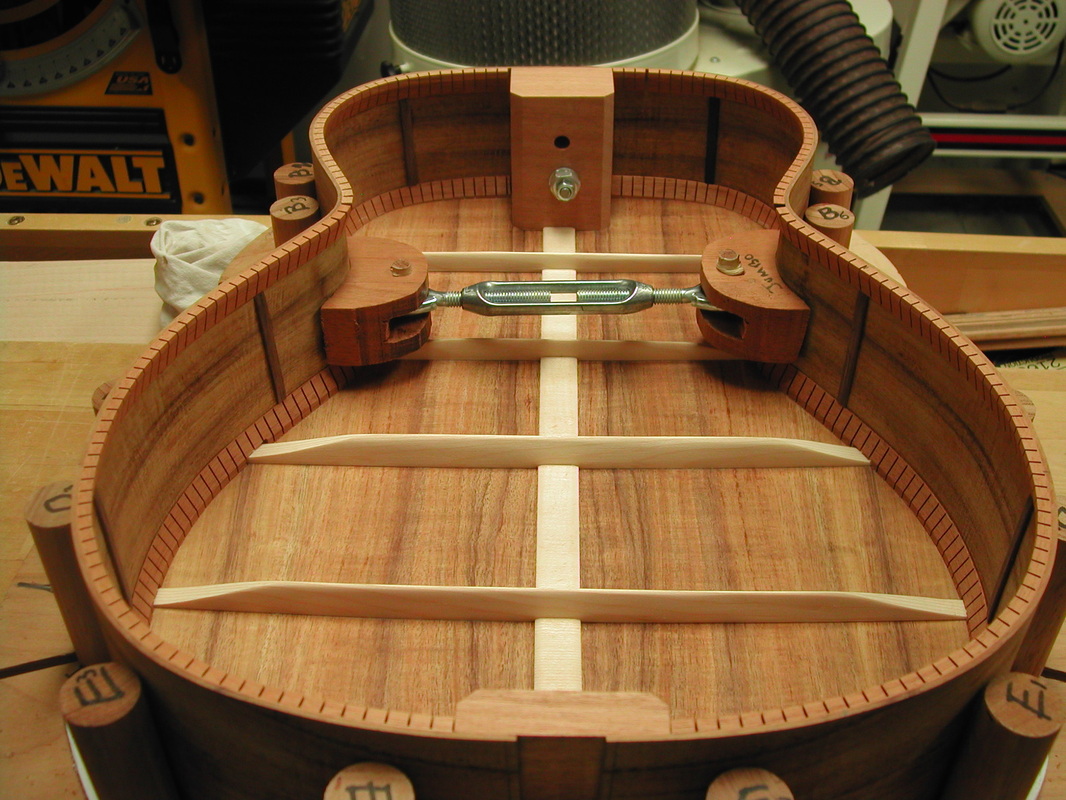
Finished back braces and back have been glued to the sides:
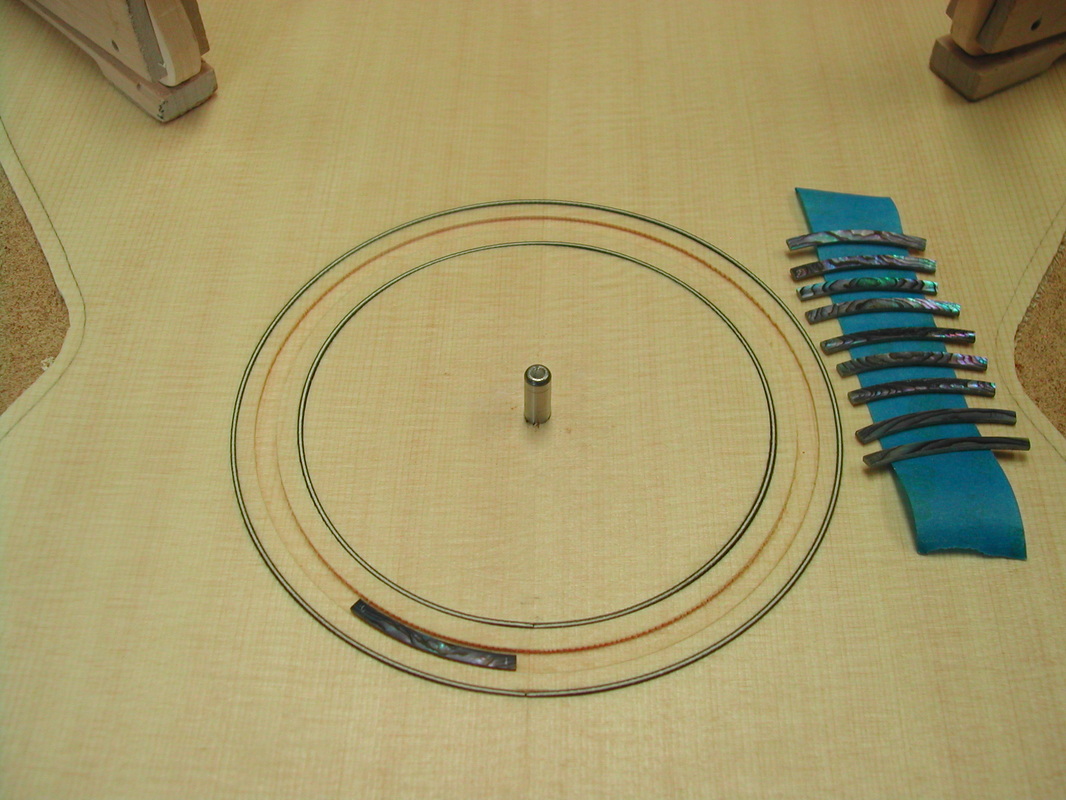
Before bracing the top, the sound hole rosette needs to be inlaid. Eric's will consist of three rings - 2 of black/white/black purfling and the middle with purfling and blue pau abalone. Ten pieces of abalone are fit to the routed channel with purfling on both sides
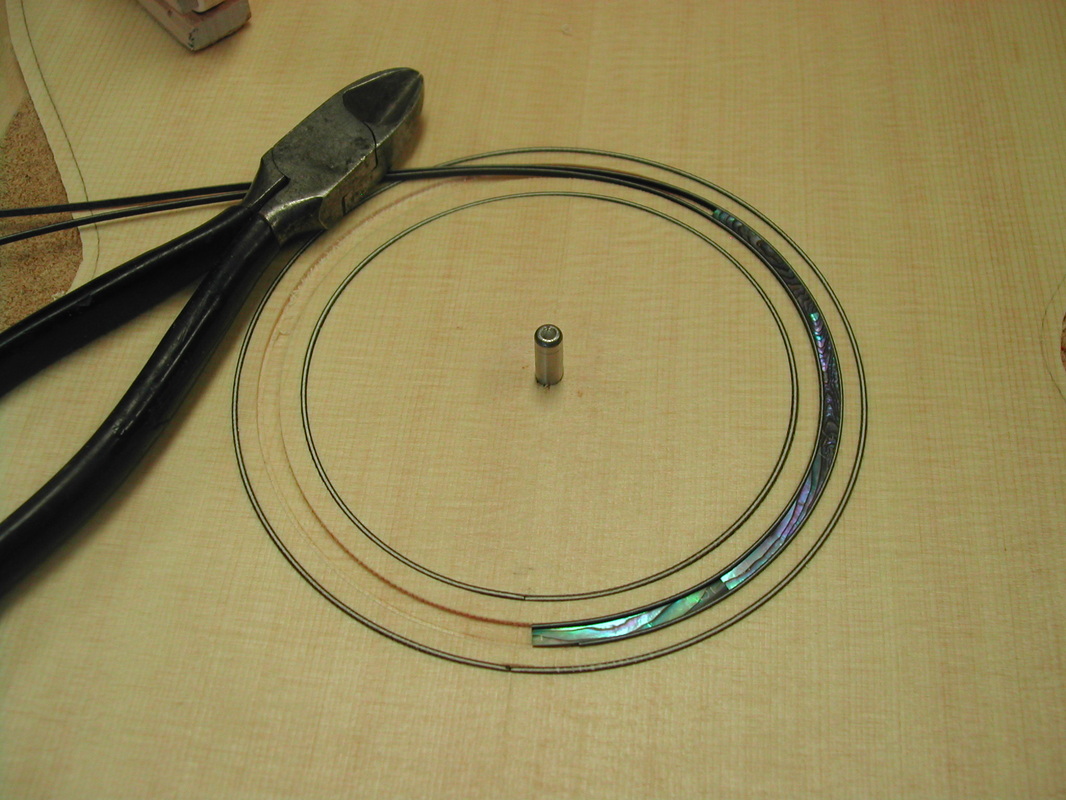
After fitting all the parts they are glued in with super glue and scraped & sanded flush. Then the sound hole is cut out and we are ready to start bracing the top. Note: the small gap in the abalone ring is covered by the fret board.

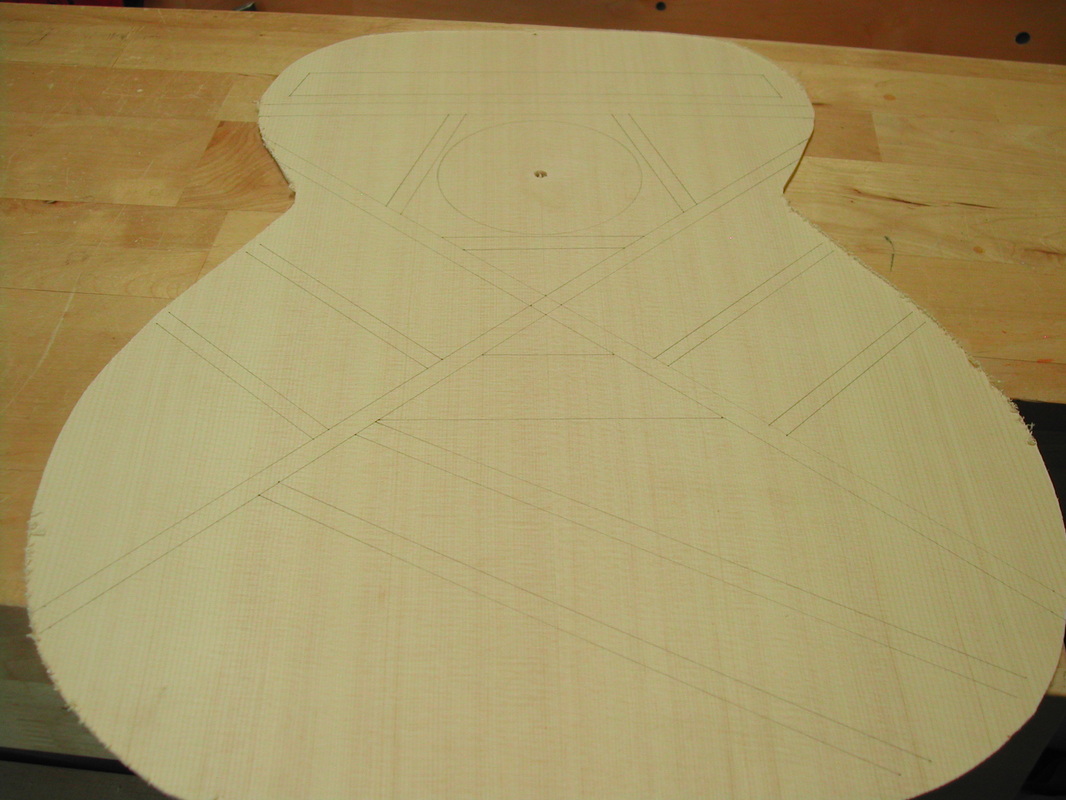
Marking the location of top braces:
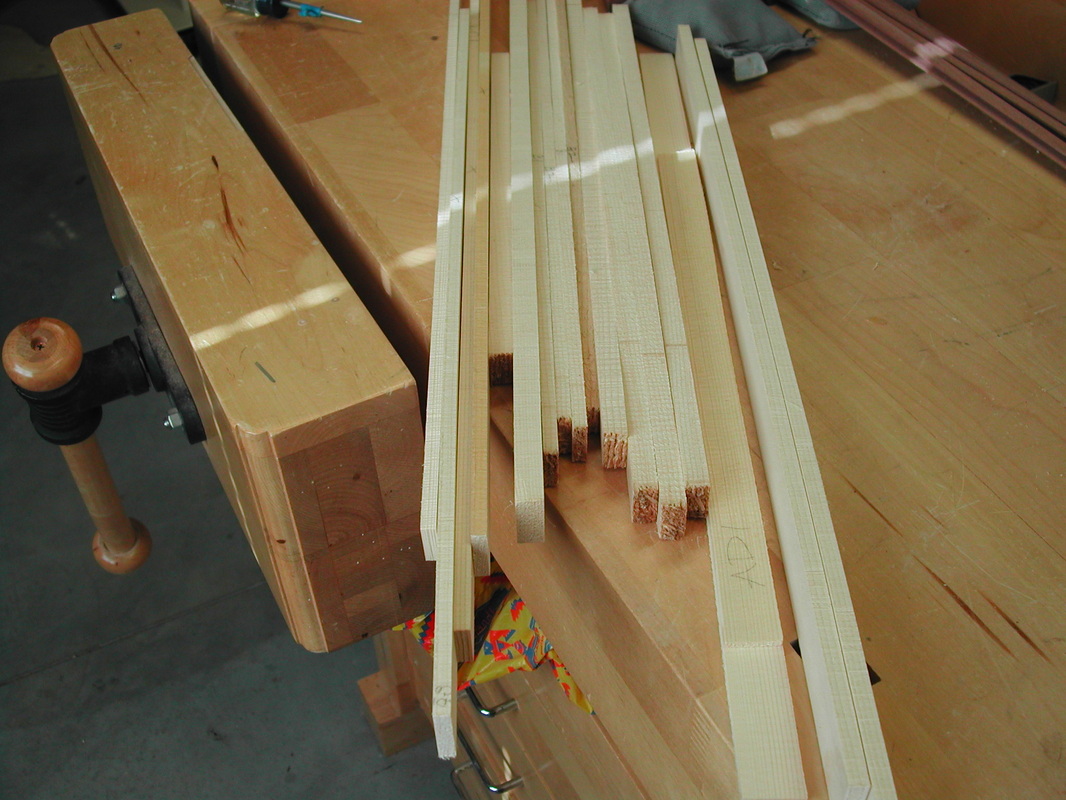
Cutting wood for top braces. The braces are cut from Lutz spruce wedges that have been hand split. Hand split wedges are important as this insures that we get stiffer braces with less weight. Allowing me to pick and shape braces to a lighter weight but still have the stiffness needed for the top. Which means a lighter, more responsive guitar.
Bracing the top: The following pictures show the top bracing. There is a lot more going on than what the pictures show. Braces aren't just glued and shaped. They are tested for stiffness and they are shaped in relation to the stiffness and the tap tones produced from the top. Everyone has their ideas about how to do this and there is some "voodoo" involved. I'm looking for a pleasant musical sounding tap as opposed to an over braced "thud". I want the top to move freely. I want it to be responsive to the vibration of the strings but with enough strength to counter the "imploding" pressure of the constant string pull. It's a fine line between strength & responsiveness and if that were the only consideration then finding it would not be too difficult. But a guitar in use and especially one with an active performer needs to be able to take the extra stress from life on the road. This guitar for Mr. Ellis is being built with a little more strength than I would build a guitar for someone who plays once a week and stores their guitar in a humidified display box in their living room. One of the advantages to custom built guitars is that the builder can take into account the actual intended use of the guitar. Enough! I could go on for pages.
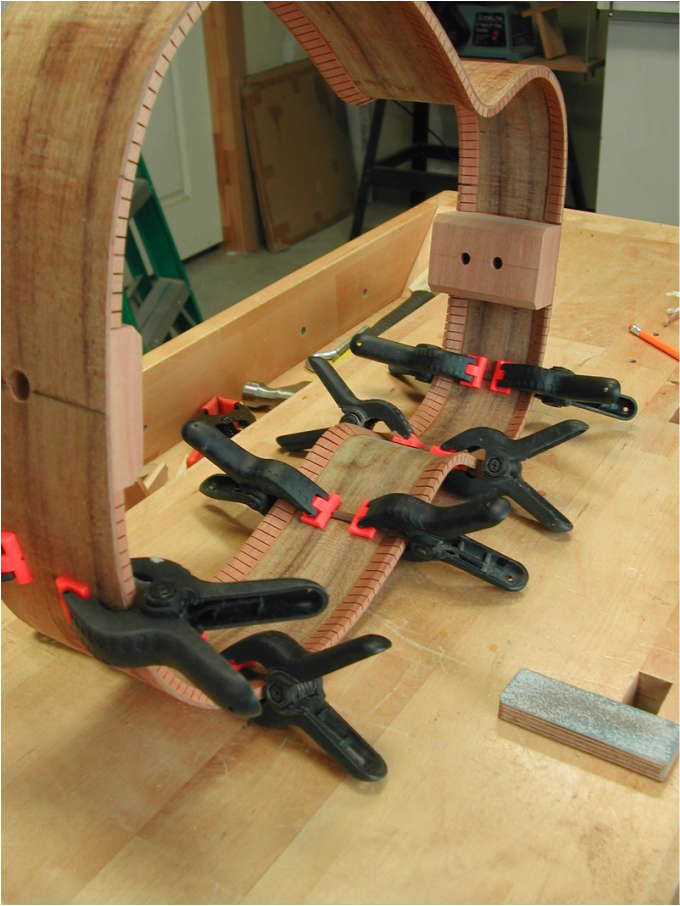
The sound board is glued to the sides
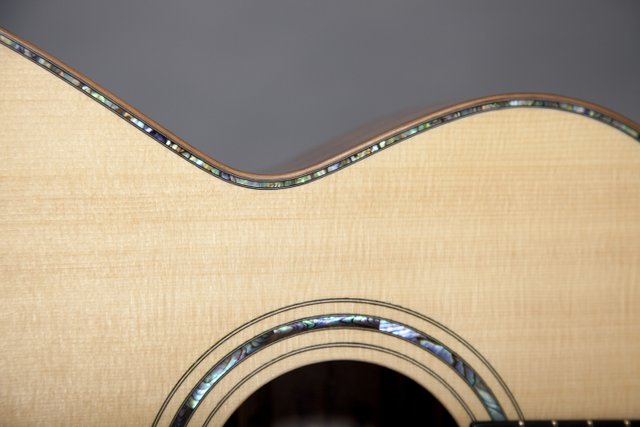
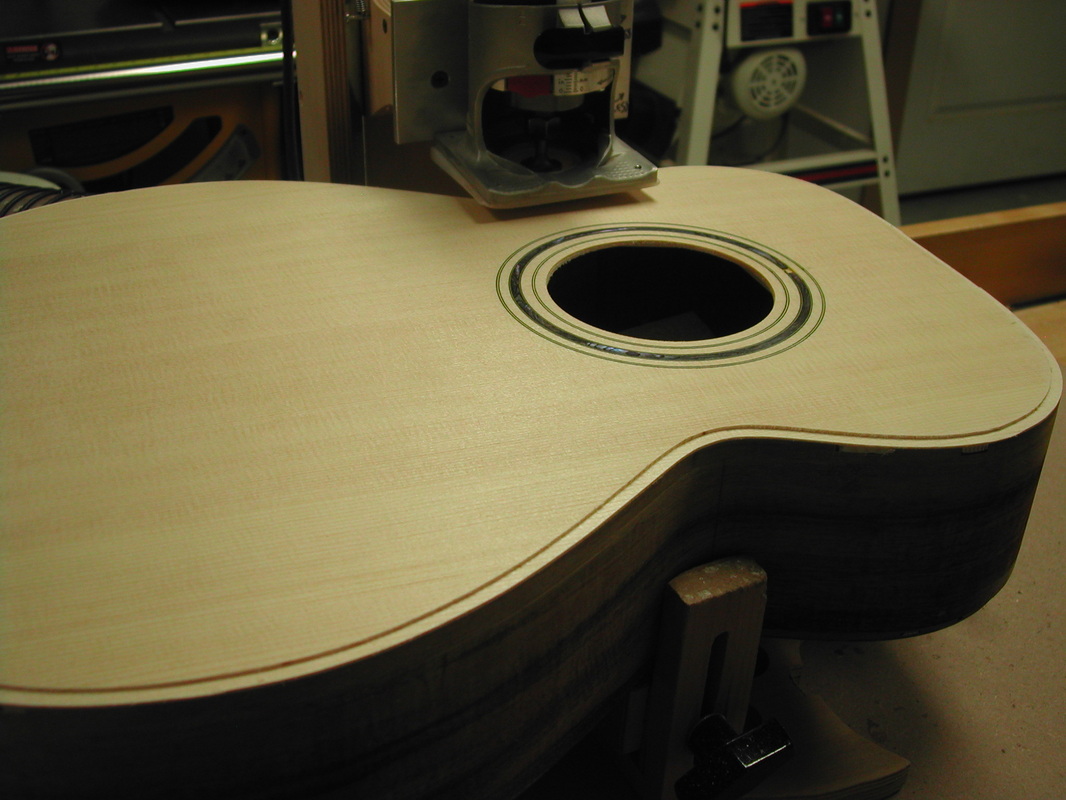
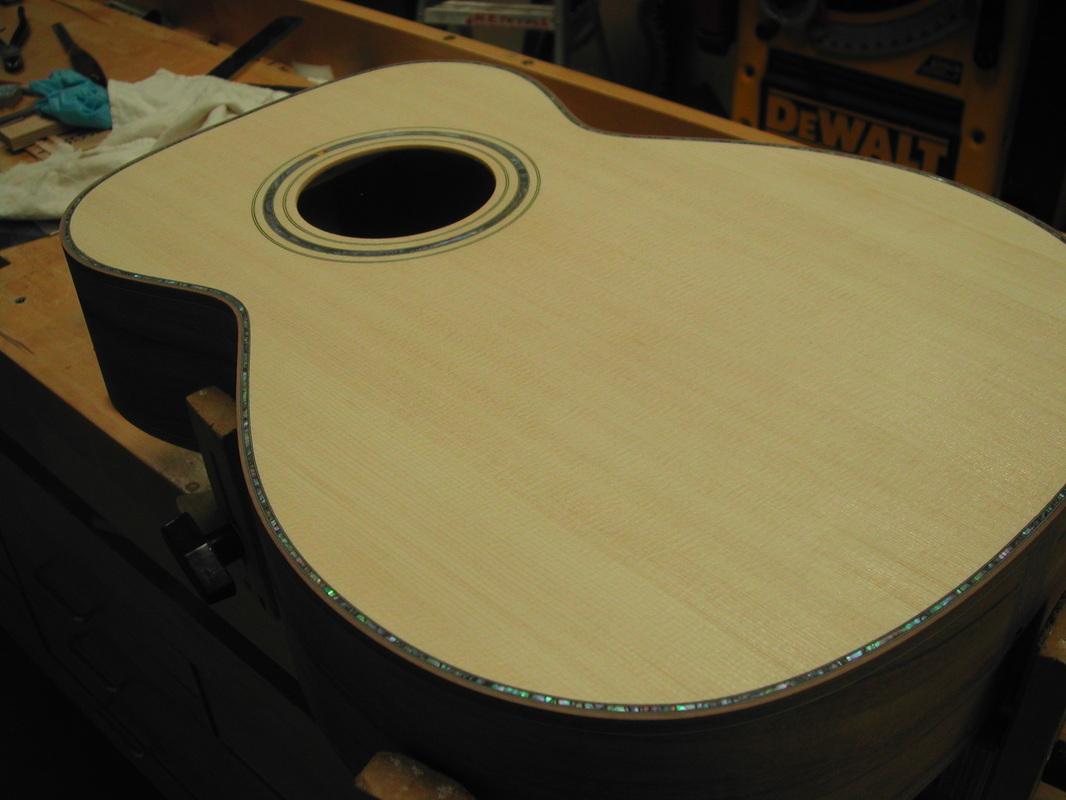
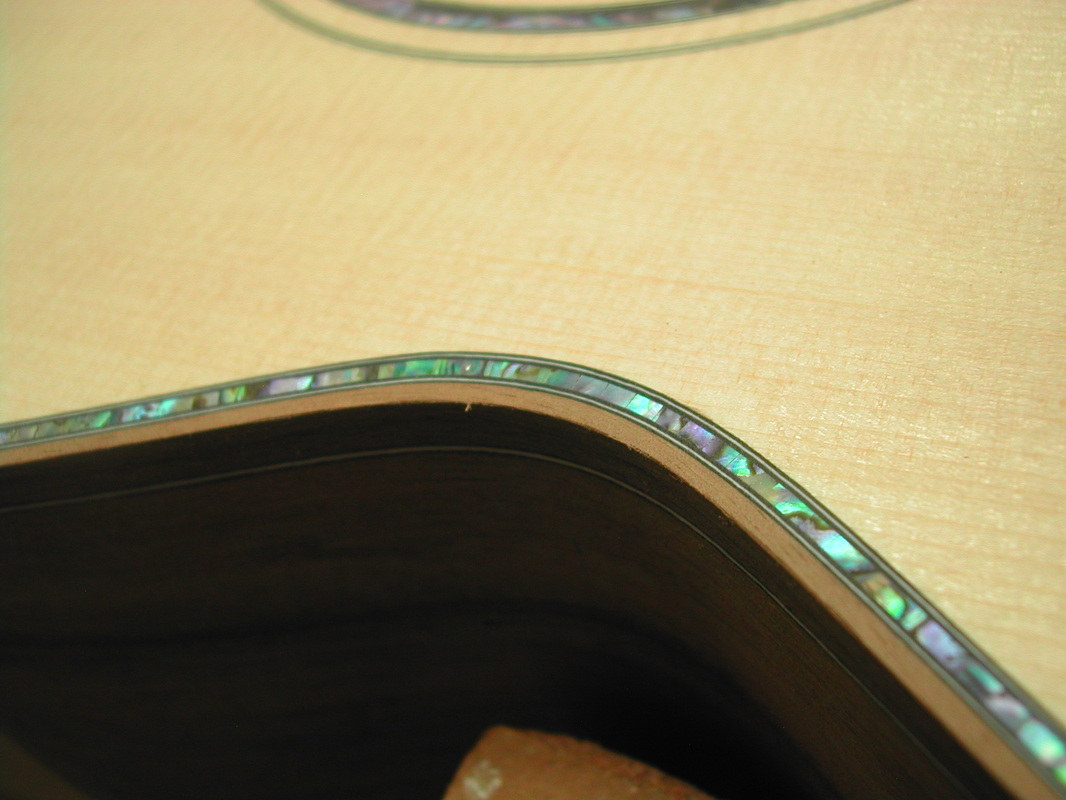
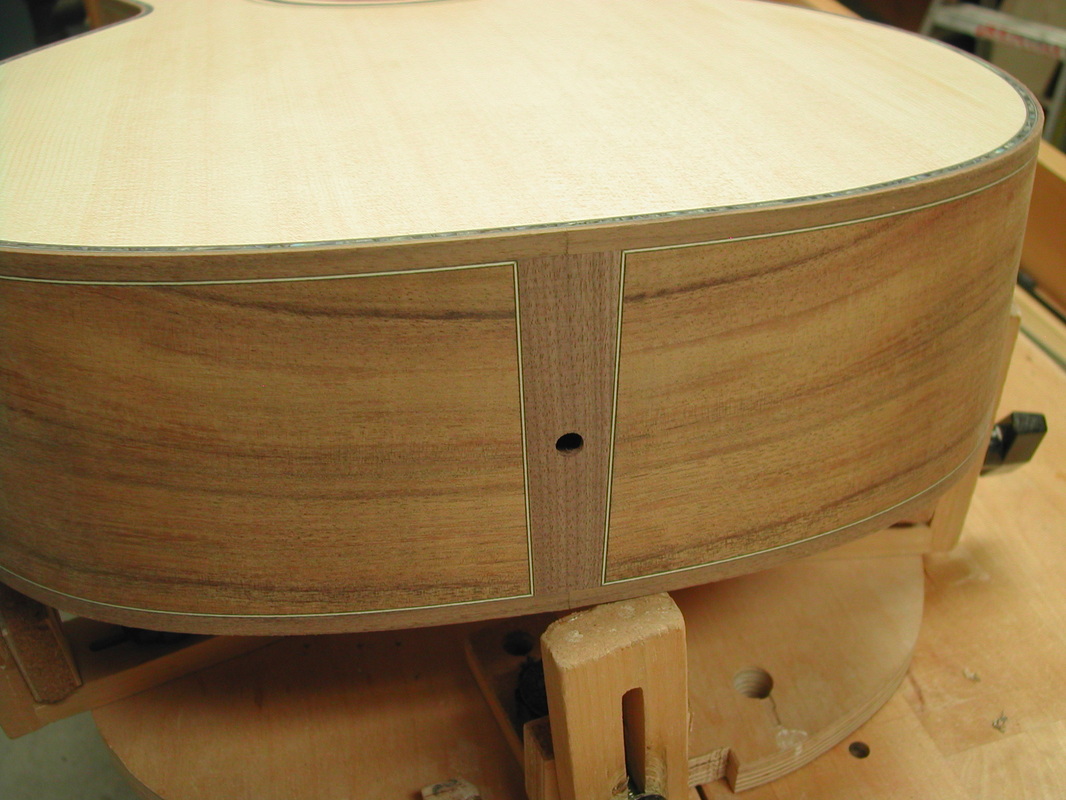
The following pictures show the bindings being installed, starting with the walnut bindings and purfling being bent in the same manner as the sides. . Bindings are protective, decorative and give strength to the side-top & side-back interface. Black/white/black purfling and blue pau abalone strips decorate the sound board.
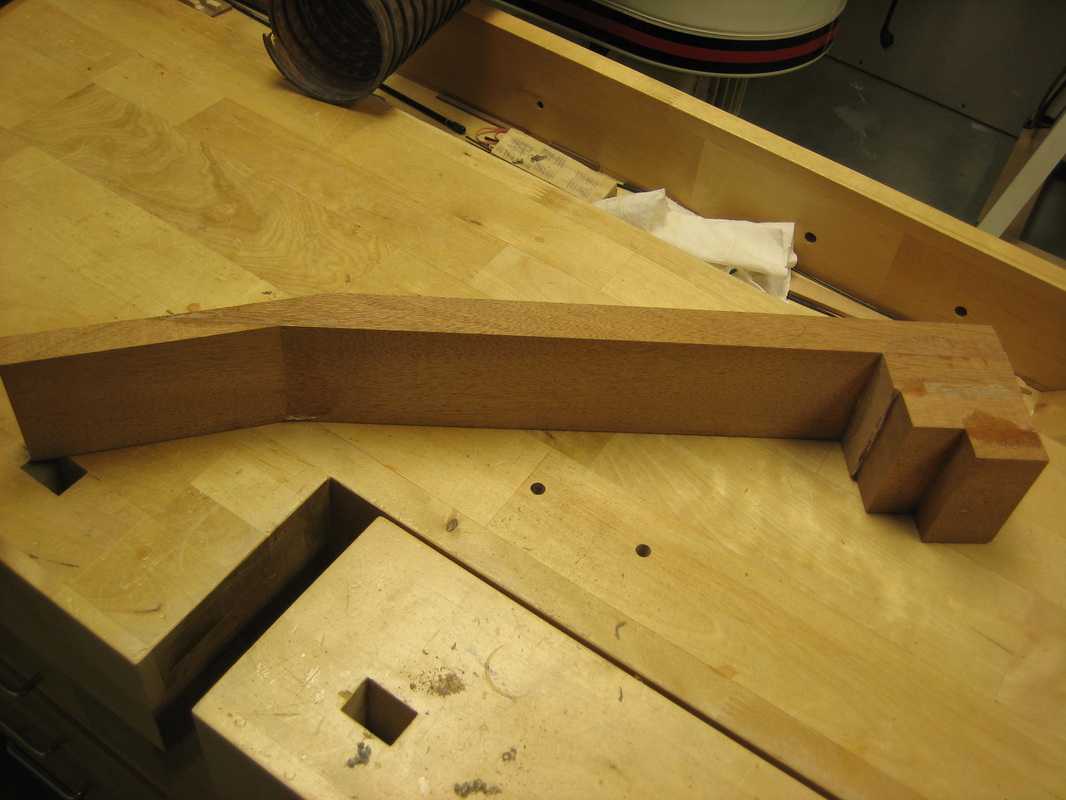
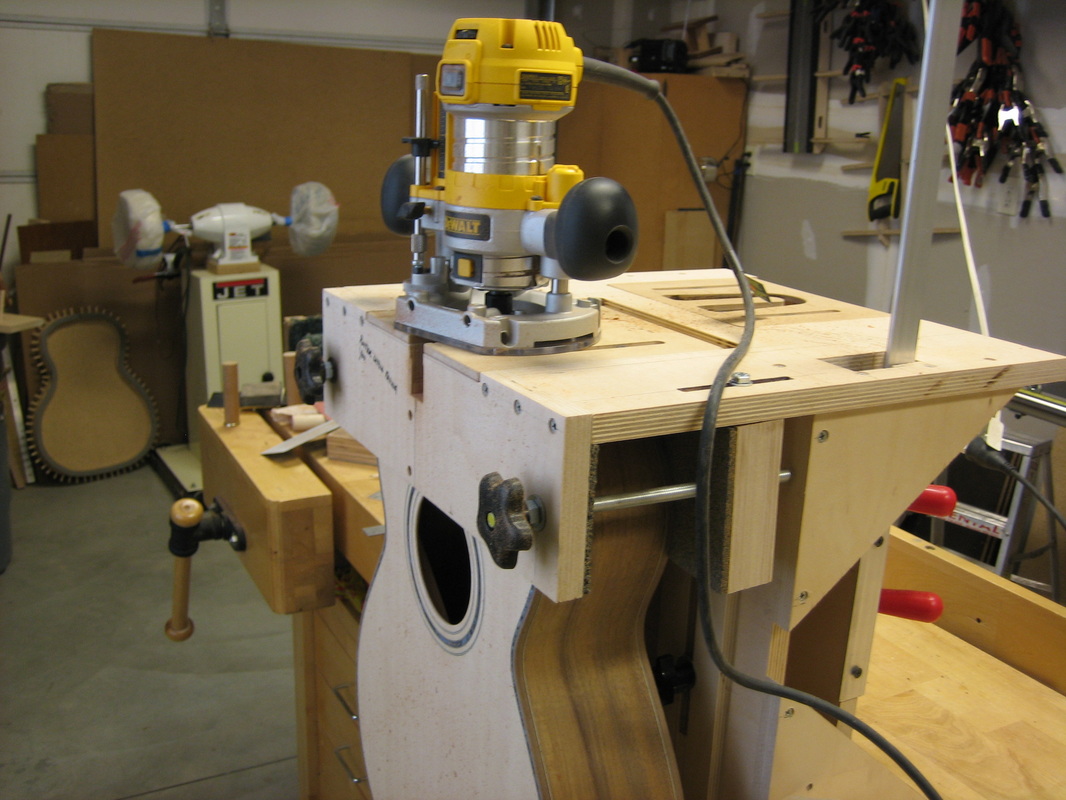
Now that the sound box is essentially done, I will start on the neck. I am using South American Mahogany. I start with a quarter-sawn board 3" x 1" x 30". Cut a 15 degree splice for the peg head and stack four pieces of mahogany for the heel.
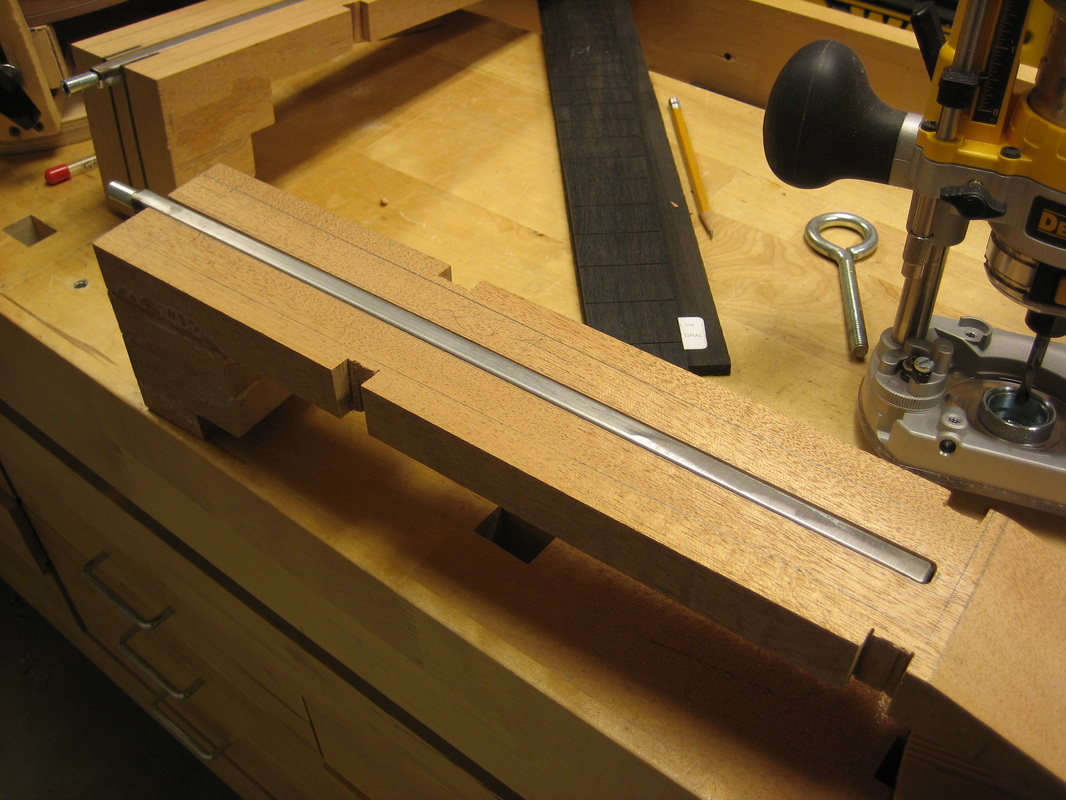
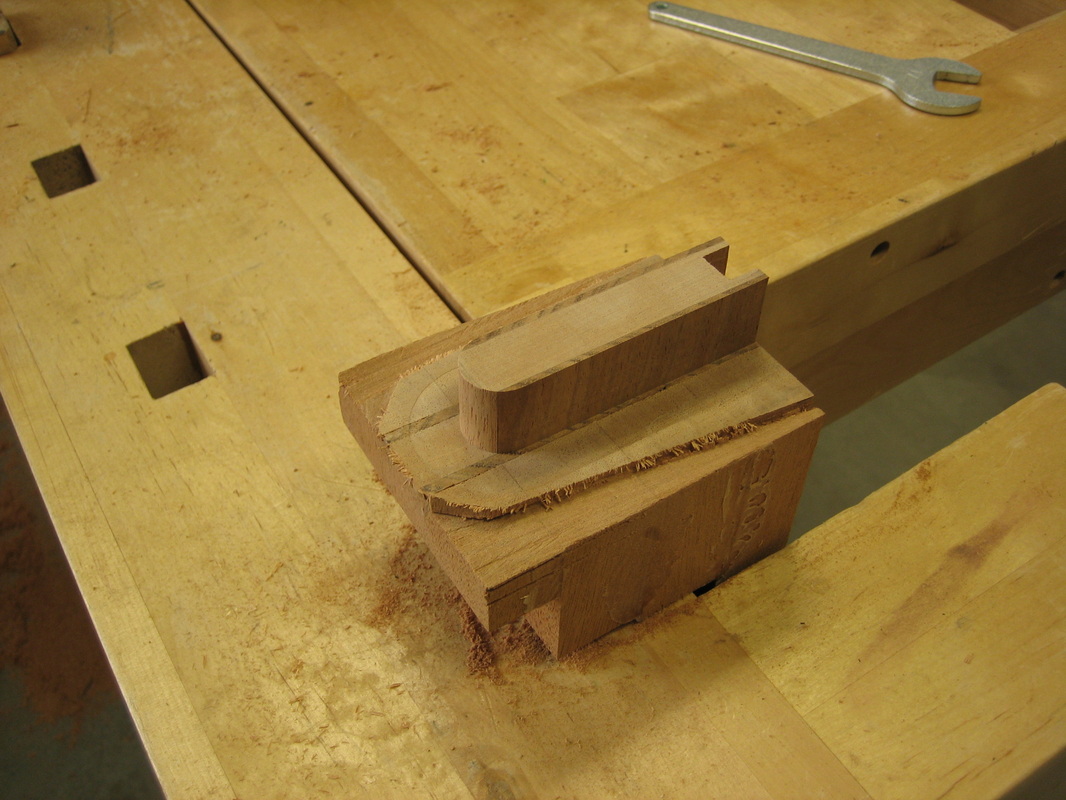
Cutting Mortise and tenon for neck joint
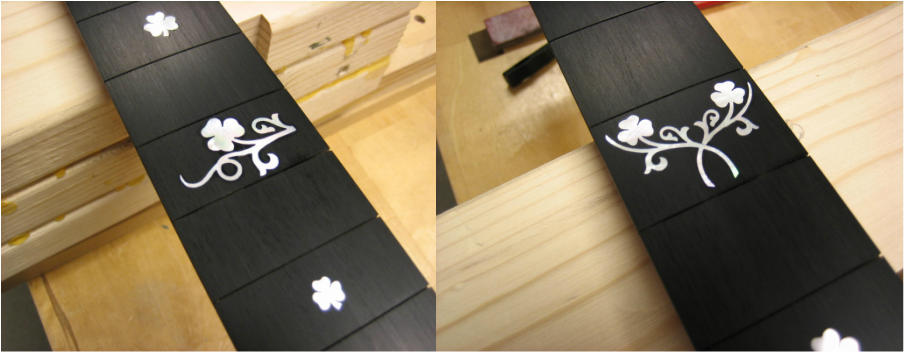
Fret board glued to neck and inlay paper copies positioned:
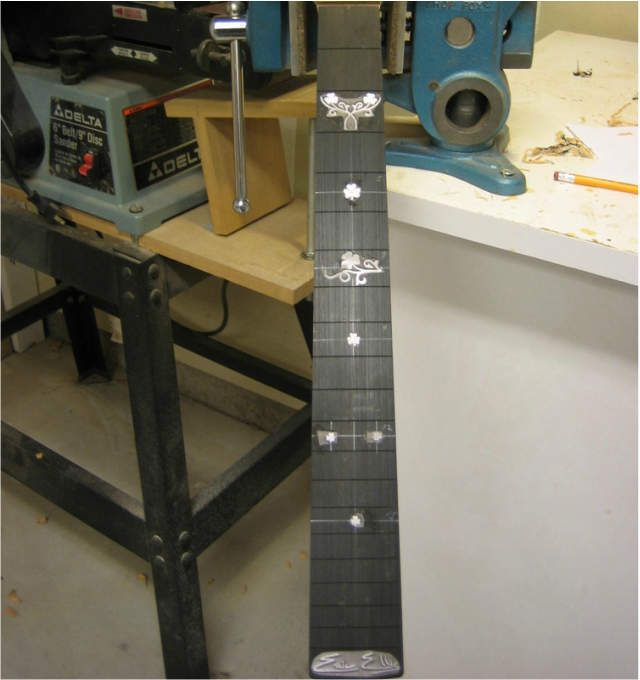
Fret Board Inlays:
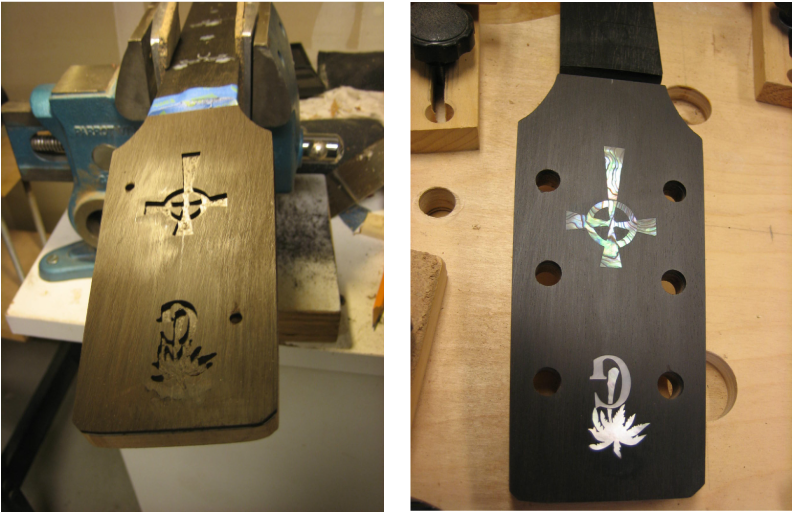
Peg Head Inlays:
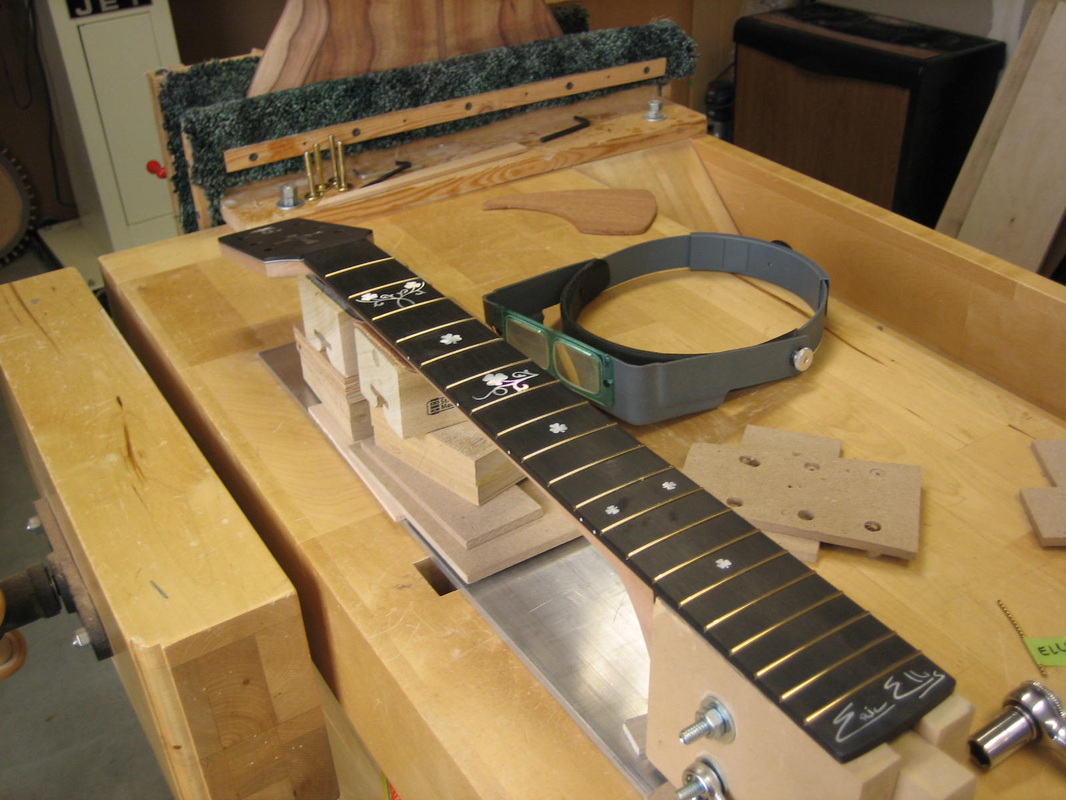
Frets installed:
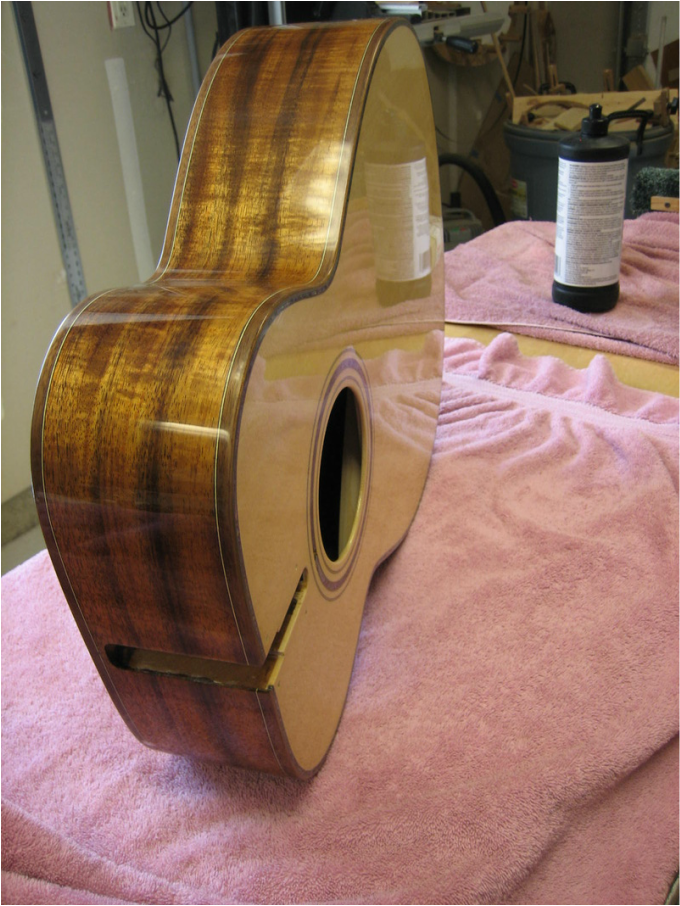
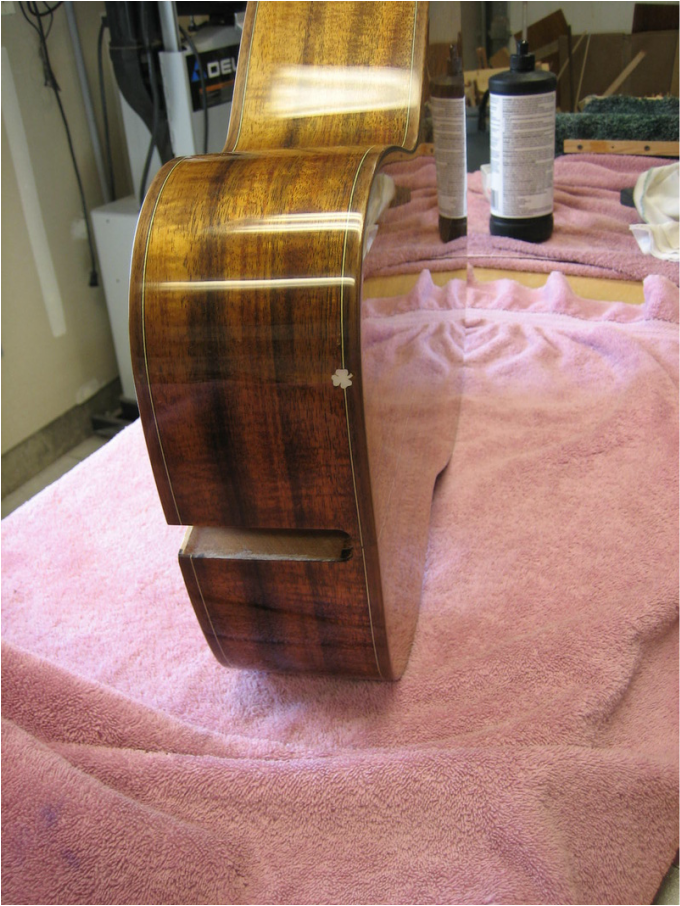
The sound box has been sprayed with a water based finish, allowed to cure for 3 weeks and then sanded and buffed in the pictures below:
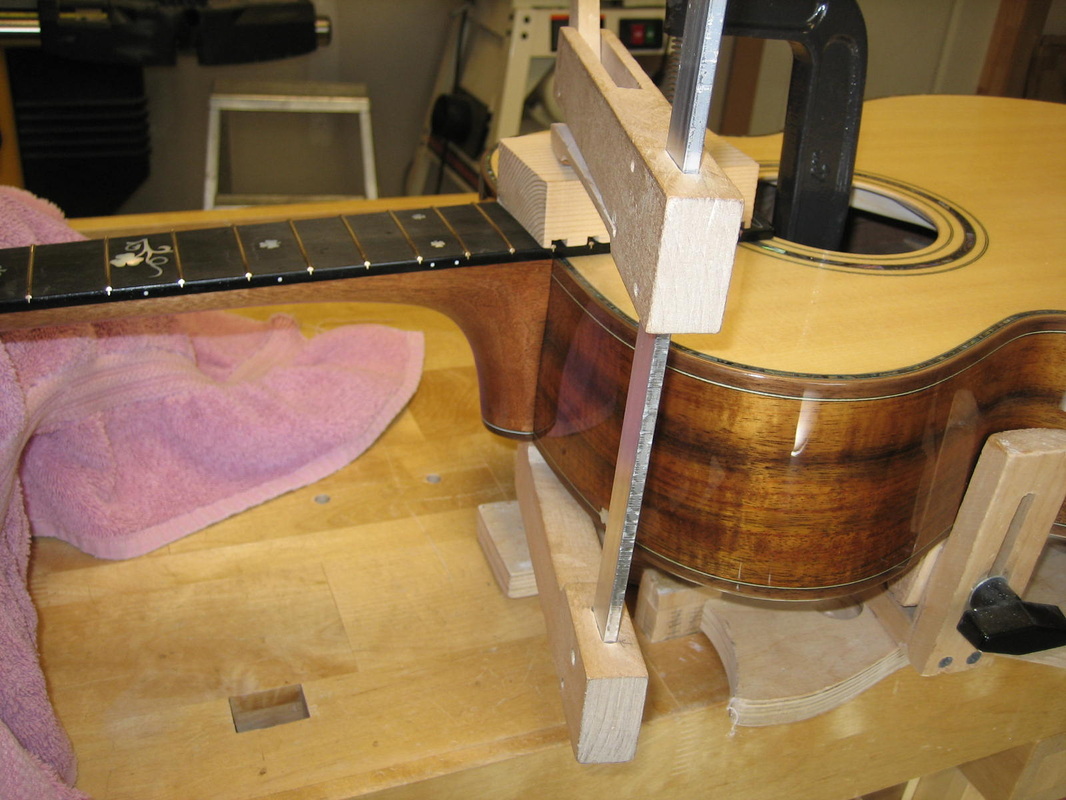
The neck is joined to the sound box:
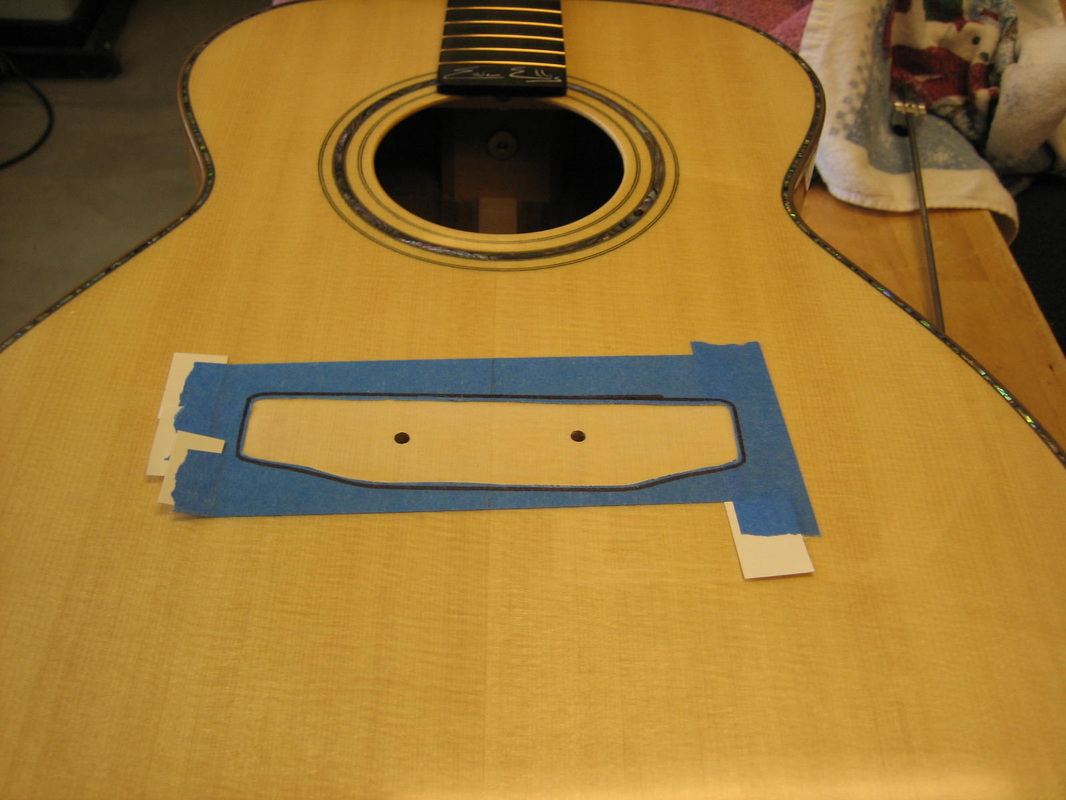
Bridge position is determined and the finish is scraped from that area. The bridge is glued to the top:

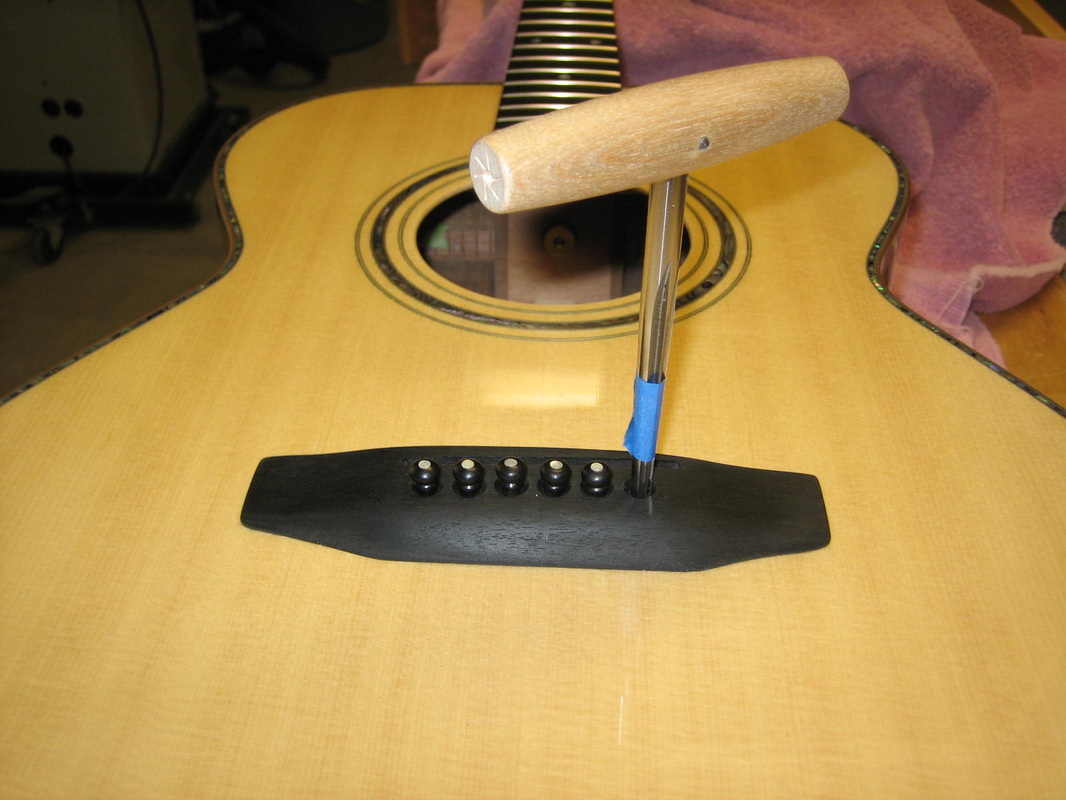
Fitting bridge pins:
Installing tuning machines and slotting nut:
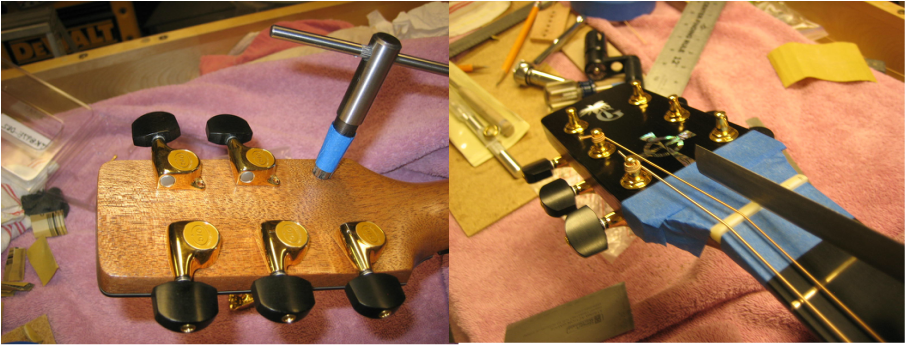
String action at the 12th fret has been adjusted and nut action is being adjusted in the picture below:

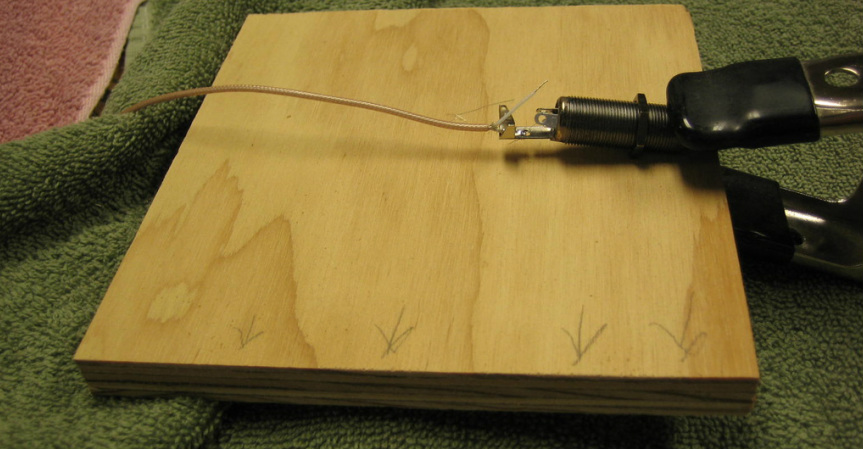
Soldering the pick up wires to the end pin jack:
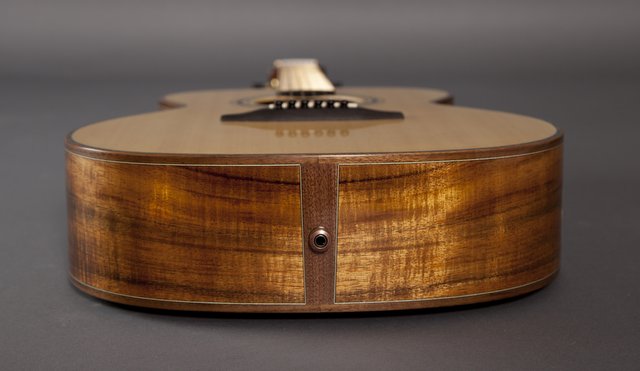
Pictures of finished guitar by Jeanne Giltzow